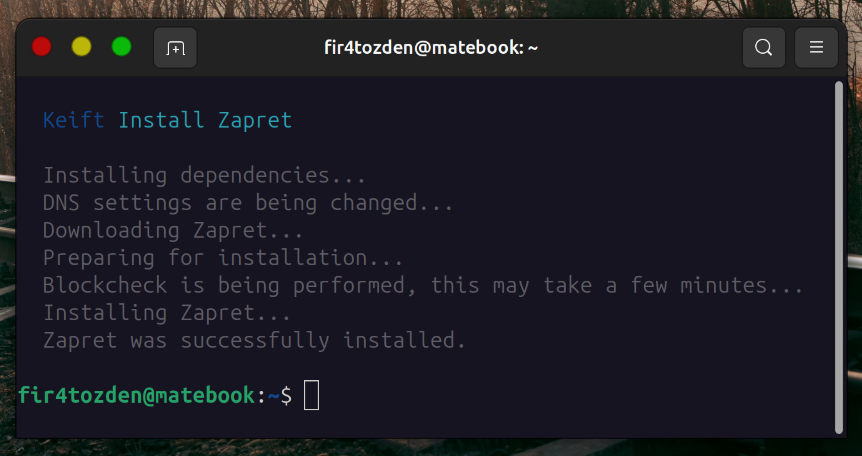
Install Zapret
Install Zapret to bypass DPI barriers.
✨ Install Zapret in one step
Installing Zapret is now very easy!
Installation
You can install it as follows.
curl -fsSL https://raw.github.com/keift/zapret/refs/heads/main/src/install.sh | bashUninstall
You can uninstall it as follows.
curl -fsSL https://raw.github.com/keift/zapret/refs/heads/main/src/uninstall.sh | bashScreenshots
Here it is.

Archived: Step-by-step installation
1. Install dependencies
Dependencies for installation.
# Debian, Ubuntu, Linux Mint, Kali Linux, Pop!_OS (APT)
sudo apt install -y bind9-dnsutils curl dnscrypt-proxy nftables systemd-resolved unzip wget

# RHEL, Fedora, CentOS, AlmaLinux, Rocky Linux (DNF)
sudo dnf install -y bind-utils curl dnscrypt-proxy nftables systemd-resolved unzip wget

# Arch Linux, Manjaro, CachyOS, EndeavourOS, Artix Linux (Pacman)
sudo pacman -S --noconfirm bind curl dnscrypt-proxy nftables systemd-resolved unzip wget

# openSUSE Tumbleweed, openSUSE Leap, SUSE Linux Enterprise, GeckoLinux, Regata OS (Zypper)
sudo zypper -n install bind-utils curl dnscrypt-proxy nftables systemd-resolved unzip wget2. Change DNS settings
Zapret only bypasses DPI restrictions. But it does not set up a DNS for us. We need to do that ourselves.
Cloudflare DNS (Recommended)
3. Download Zapret
Download the compiled zip file as release on GitHub.
# Delete if present
sudo rm -rf /tmp/zapret-v72.9
sudo rm -rf /tmp/zapret-v72.9.zip

# Download the compiled zip file from GitHub
sudo wget -P /tmp https://github.com/bol-van/zapret/releases/download/v72.9/zapret-v72.9.zip

# Unzip the zip file
sudo unzip -d /tmp /tmp/zapret-v72.9.zip

# Delete the zip file that we no longer need
sudo rm -rf /tmp/zapret-v72.9.zip4. Prepare for installation
Install the requirements and prepare to perform a clean install.
# For a clean installation, remove any installation files that may be present in case an installation has been made before
sudo /opt/zapret/uninstall_easy.sh
sudo rm -rf /opt/zapret

# Install requirements
sudo /tmp/zapret-v72.9/install_prereq.sh
sudo /tmp/zapret-v72.9/install_bin.sh
Here are the answers you need to give to the questions you may encounter during this time.
select firewall type :
1 : iptables
2 : nftables
your choice (default : nftables) : 🟩 [LEAVE THIS QUESTION BLANK] 🟩5. Do Blockcheck
Find the DPI methods implemented by the ISP.
# Run the test
sudo /tmp/zapret-v72.9/blockcheck.sh
Here are the answers you need to give to the questions you may encounter during this time.
domain(s) (default: rutracker.org) : 🟥 [ENTER A WEBSITE DOMAIN NAME BLOCKED IN YOUR COUNTRY HERE - EXAMPLE: discord.com] 🟥ip protocol version(s) - 4, 6 or 46 for both (default: 4) : 🟩 [LEAVE THIS QUESTION BLANK] 🟩check http (default : Y) (Y/N) ? 🟩 [LEAVE THIS QUESTION BLANK] 🟩check https tls 1.2 (default : Y) (Y/N) ? 🟩 [LEAVE THIS QUESTION BLANK] 🟩check https tls 1.3 (default : N) (Y/N) ? 🟩 [LEAVE THIS QUESTION BLANK] 🟩how many times to repeat each test (default: 1) : 🟩 [LEAVE THIS QUESTION BLANK] 🟩quick - scan as fast as possible to reveal any working strategy
standard - do investigation what works on your DPI
force - scan maximum despite of result
1 : quick
2 : standard
3 : force
your choice (default : standard) : 🟩 [LEAVE THIS QUESTION BLANK] 🟩Wait for the test to finish. This may take a few minutes.
After the process is finished, the test results will appear.
Copy the latest setting from these results. Example:
curl_test_https_tls12 ipv4 discord.com : nfqws --dpi-desync=fakeddisorder --dpi-desync-ttl=1 --dpi-desync-autottl=-5 --dpi-desync-split-pos=1
                                               ^^^^^^^^^^^^^^^^^^^^^^^^^^^^^^^^^^^^^^^^^^^^^^^^^^^^^^^^^^^^^^^^^^^^^^^^^^^^^^^^^^^^^^^^^^^^^^
                                                                                     MAKE A NOTE FOR IT
This is an example settings for NFQWS. It may be different for each person. Make a note of it.
--dpi-desync=fakeddisorder --dpi-desync-ttl=1 --dpi-desync-autottl=-5 --dpi-desync-split-pos=16. Install Zapret
We can start installing Zapret.
# Start the installation
sudo /tmp/zapret-v72.9/install_easy.sh
Here are the answers you need to give to the questions you may encounter during this time.
do you want the installer to copy it for you (default : N) (Y/N) ? 🟥 [TYPE "Y"] 🟥select firewall type :
1 : iptables
2 : nftables
your choice (default : nftables) : 🟩 [LEAVE THIS QUESTION BLANK] 🟩enable ipv6 support (default : N) (Y/N) ? 🟩 [LEAVE THIS QUESTION BLANK] 🟩select flow offloading :
1 : none
2 : software
3 : hardware
your choice (default : none) : 🟩 [LEAVE THIS QUESTION BLANK] 🟩select filtering :
1 : none
2 : ipset
3 : hostlist
4 : autohostlist
your choice (default : none) : 🟩 [LEAVE THIS QUESTION BLANK] 🟩enable tpws socks mode on port 987 ? (default : N) (Y/N) ? 🟩 [LEAVE THIS QUESTION BLANK] 🟩enable tpws transparent mode ? (default : N) (Y/N) ? 🟩 [LEAVE THIS QUESTION BLANK] 🟩enable nfqws ? (default : N) (Y/N) ? 🟥 [TYPE "Y"] 🟥do you want to edit the options (default : N) (Y/N) ? 🟥 [TYPE "Y"] 🟥Then we write the NFQWS settings that we just copied to NFQWS_OPT. Example:
NFQWS_PORTS_TCP=80,443
NFQWS_PORTS_UDP=443
NFQWS_TCP_PKT_OUT=9
NFQWS_TCP_PKT_IN=3
NFQWS_UDP_PKT_OUT=9
NFQWS_UDP_PKT_IN=0
NFQWS_PORTS_TCP_KEEPALIVE=
NFQWS_PORTS_UDP_KEEPALIVE=
NFQWS_OPT="--dpi-desync=fakeddisorder --dpi-desync-ttl=1 --dpi-desync-autottl=-5 --dpi-desync-split-pos=1"
           ^^^^^^^^^^^^^^^^^^^^^^^^^^^^^^^^^^^^^^^^^^^^^^^^^^^^^^^^^^^^^^^^^^^^^^^^^^^^^^^^^^^^^^^^^^^^^^
                                                YOUR SETTINGS HERE
Then save with CTRL + S and close with CTRL + X.
Let's continue with the questions.
do you want to edit the options (default : N) (Y/N) ? 🟩 [LEAVE THIS QUESTION BLANK] 🟩LAN interface :
1 : NONE
2 : lo
3 : wlp0s20f3
your choice (default : NONE) : 🟩 [LEAVE THIS QUESTION BLANK] 🟩WAN interface :
1 : ANY
2 : lo
3 : wlp0s20f3
your choice (default : ANY) : 🟩 [LEAVE THIS QUESTION BLANK] 🟩7. Finish the installation
All done! 🎉 We are done with this folder of Zapret anymore. We can delete it.
# Delete the folder
sudo rm -rf /tmp/zapret-v72.9TIP: Uninstall Zapret
You can uninstall it as follows.
# Uninstall Zapret
sudo /opt/zapret/uninstall_easy.sh

# Remove unused files
sudo rm -rf /opt/zapret
sudo rm -rf /tmp/zapret-v72.9TIP: Remove DNS settings
You can remove it as follows.
# Enable and start Systemd-Resolved
sudo systemctl enable systemd-resolved
sudo systemctl start systemd-resolved

# Leave the Systemd-Resolved configuration blank
sudo tee /etc/systemd/resolved.conf &>/dev/null <<< ""

# Make /etc/resolv.conf a symlink to Systemd-Resolved file
[ -e /run/systemd/resolve/stub-resolv.conf ] && sudo ln -sf /run/systemd/resolve/stub-resolv.conf /etc/resolv.conf

# Restart Systemd-Resolved for the changes to take effect
sudo systemctl restart systemd-resolved
Last updated